Helpful Tips
Overview
As we gather best practices, lessons learned, and other helpful tips and tricks, we’ll put them here. If we can help you do your jobs easier, well, that’s a good thing. And these suggestions may just do so.
General System Features/Functionality
How to Quickly Navigate Key Screens
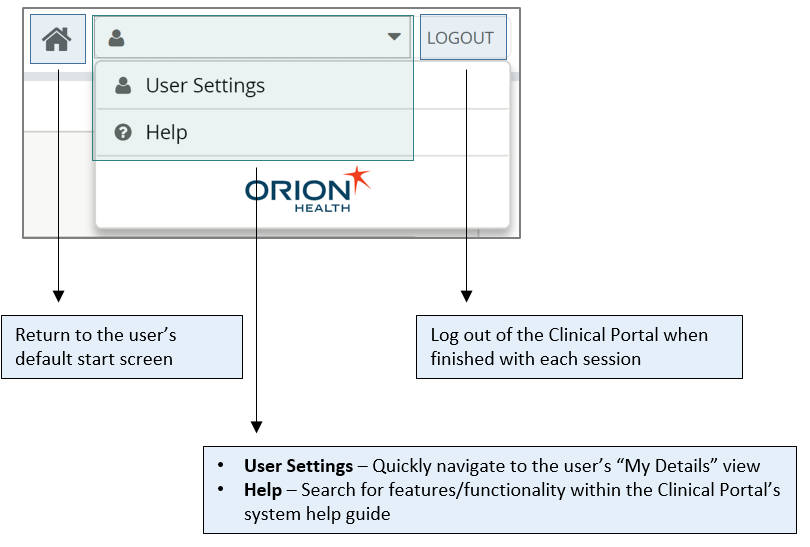
In the upper-right hand corner of the Clinical Portal is the system's "Quick Navigation" functionality. Core components featured in the functionality are outlined below.
How to Toggle Among Similar Patients
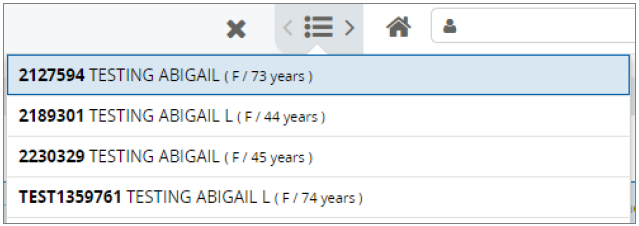
While viewing a particular patient's information, users can easily toggle to other patients that met their initial demographic search criteria in the event that a selected record does not correspond to the patient of interest.
To do so, users can select the tribar icon located in the upper-right hand corner of the page to display a drop-down menu listing all patients corresponding to their original search. Users can then select another patient from the results to view that newly selected patient's health record. Users will be required to break the privacy seal for each new patient selected from the drop-down menu.
How to Use Worklists to Keep Track of Patients
An underutilized feature of the Clinical Portal, but one that once employed can help save time for users, is the “Worklists” patient lookup function. In the upper-left hand corner of a patient’s health record, users will see a small tab with a plus (+) icon. Selecting the icon will display a number of worklist categories which, by default, are named by color (e.g., “Red,” “Blue,” etc.). Selecting a category will add the patient to the designated worklist.
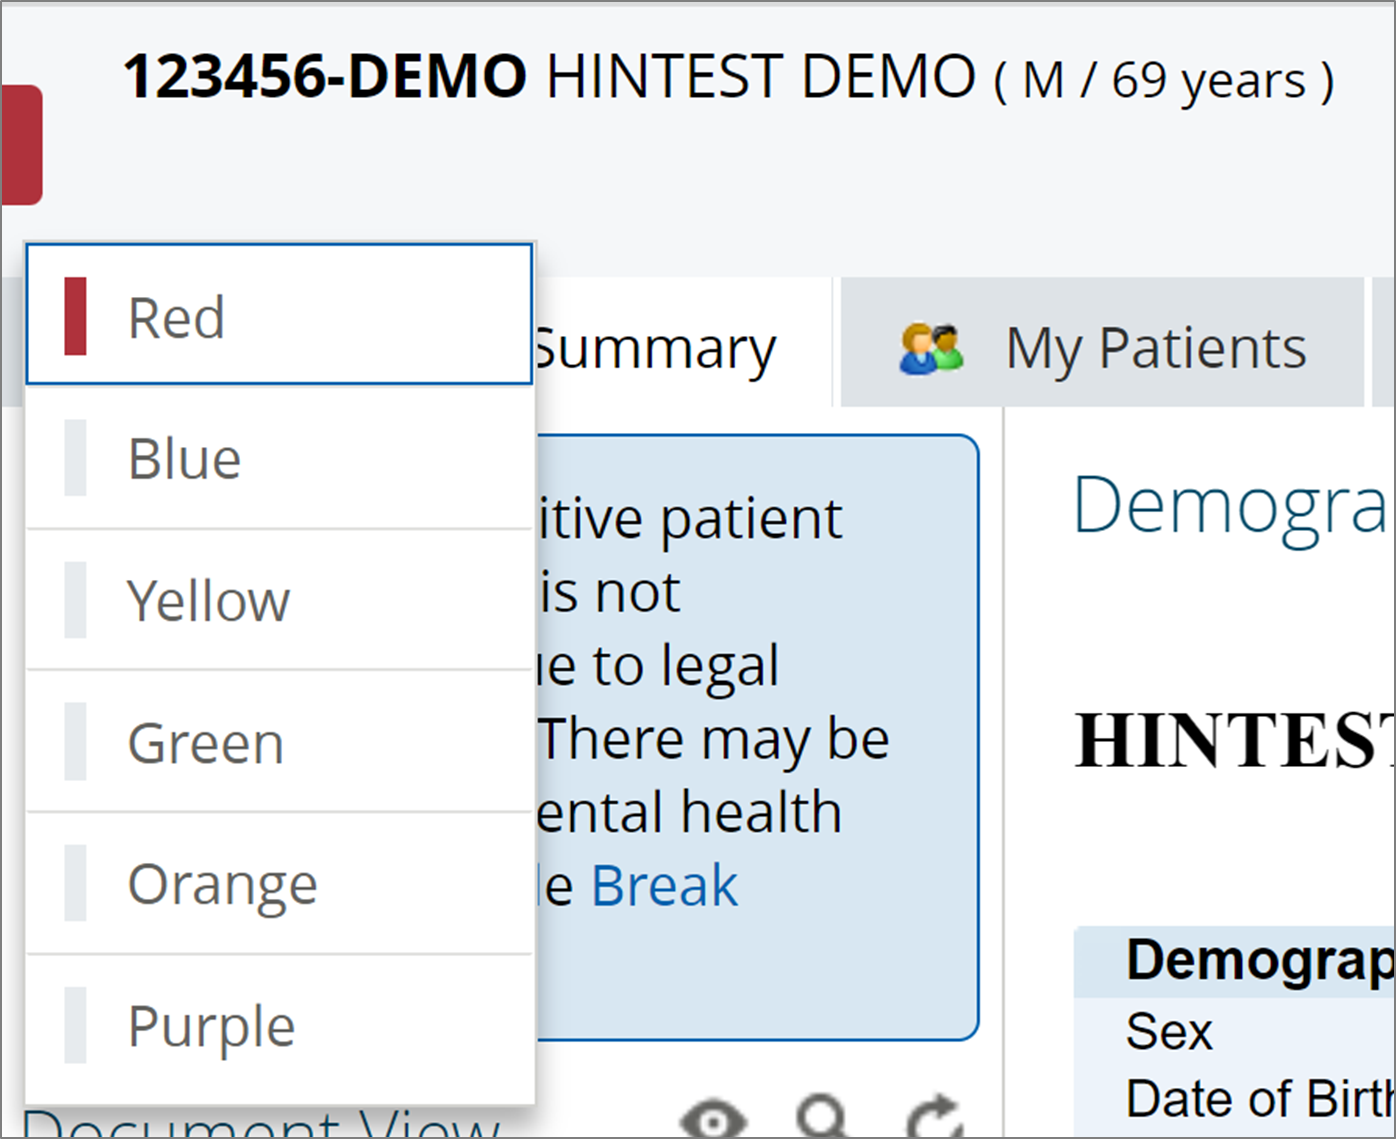
Users can then visit the “Worklists” option from within the “Patients” main navigation function to view their selections and categorizations. From this function, users can also rename the default color category labels to descriptions that make sense according to their specific workflows and use cases.

For assistance in using these system features/functionality helpful tips, please contact HealthInfoNet’s Clinical Education team.
Patient Health Record Review
How to Obtain a Summary of a Patient’s Health Record Information
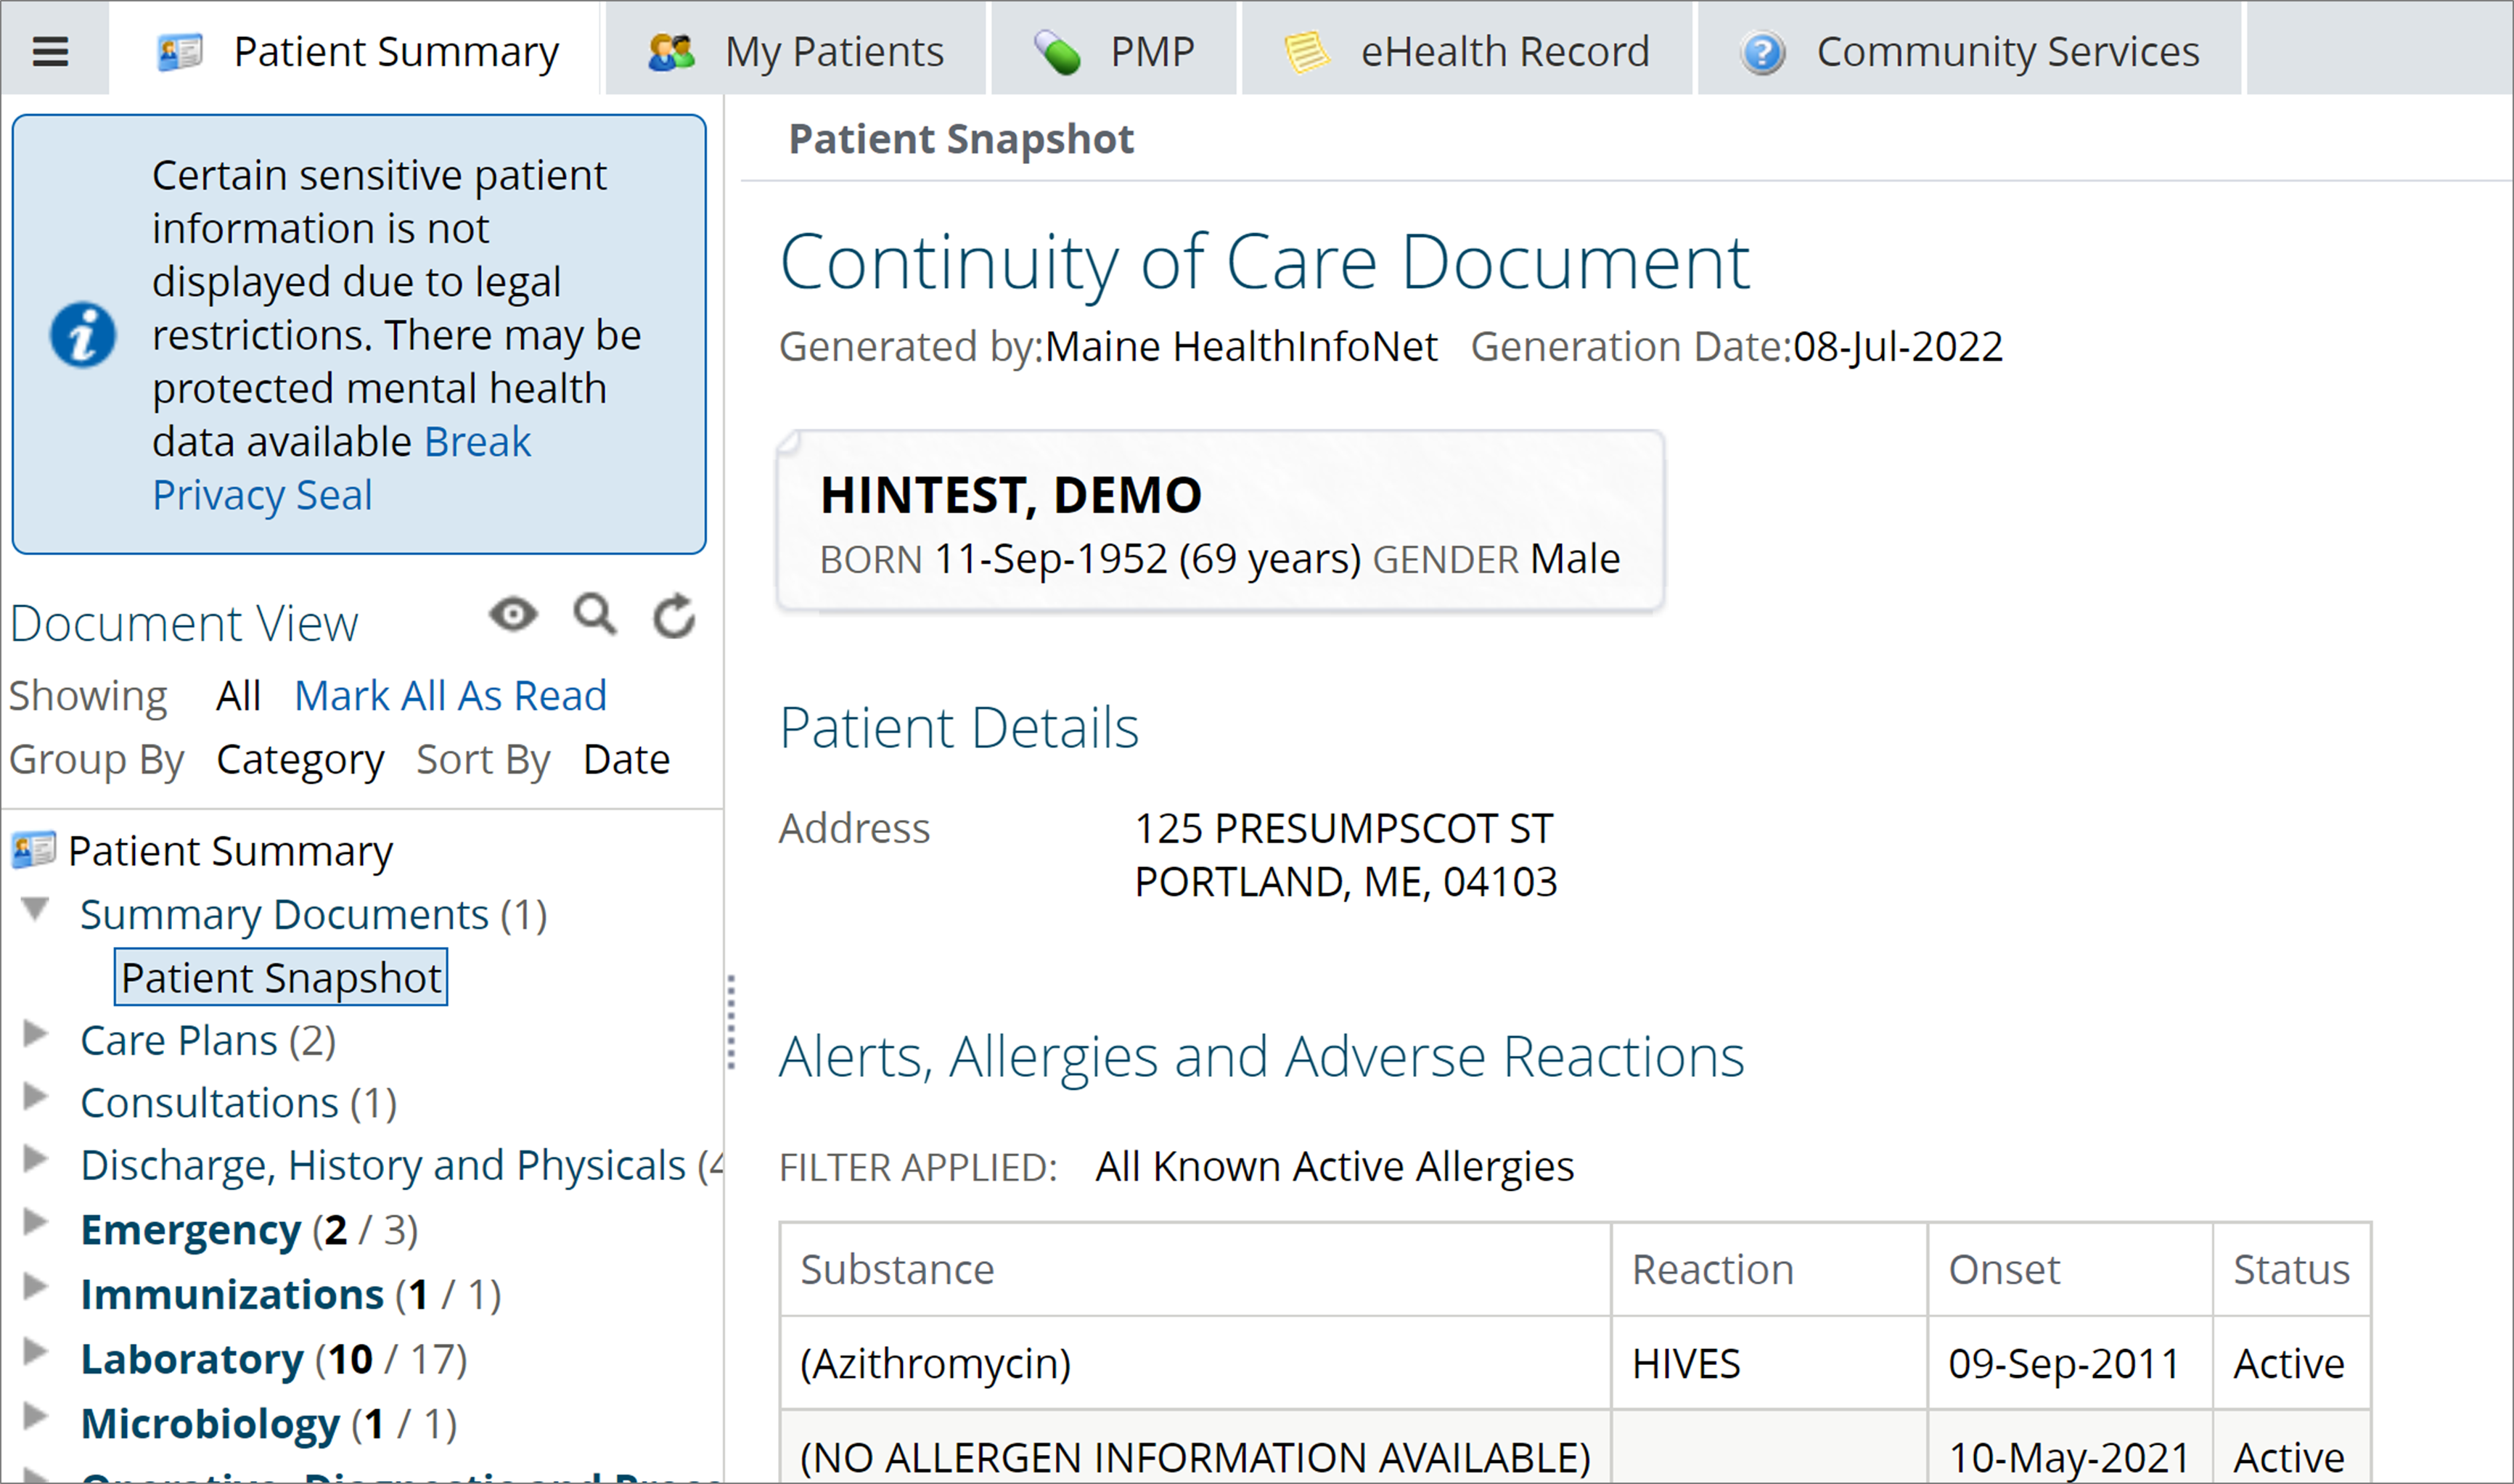
From within the “Document View,” users can access the “Summary Documents” > “Patient Snapshot” feature that summarizes a patient’s health record into a single Continuity of Care Document (CCD). This document can be downloaded, printed, and/or customized depending on user preference. The feature offers a way for users to obtain comprehensive insights from the HIE and import the desired information into their internal electronic health record (EHR) systems in a streamlined and consolidated manner.
How to Get a Patient’s Most Recent Demographic Information
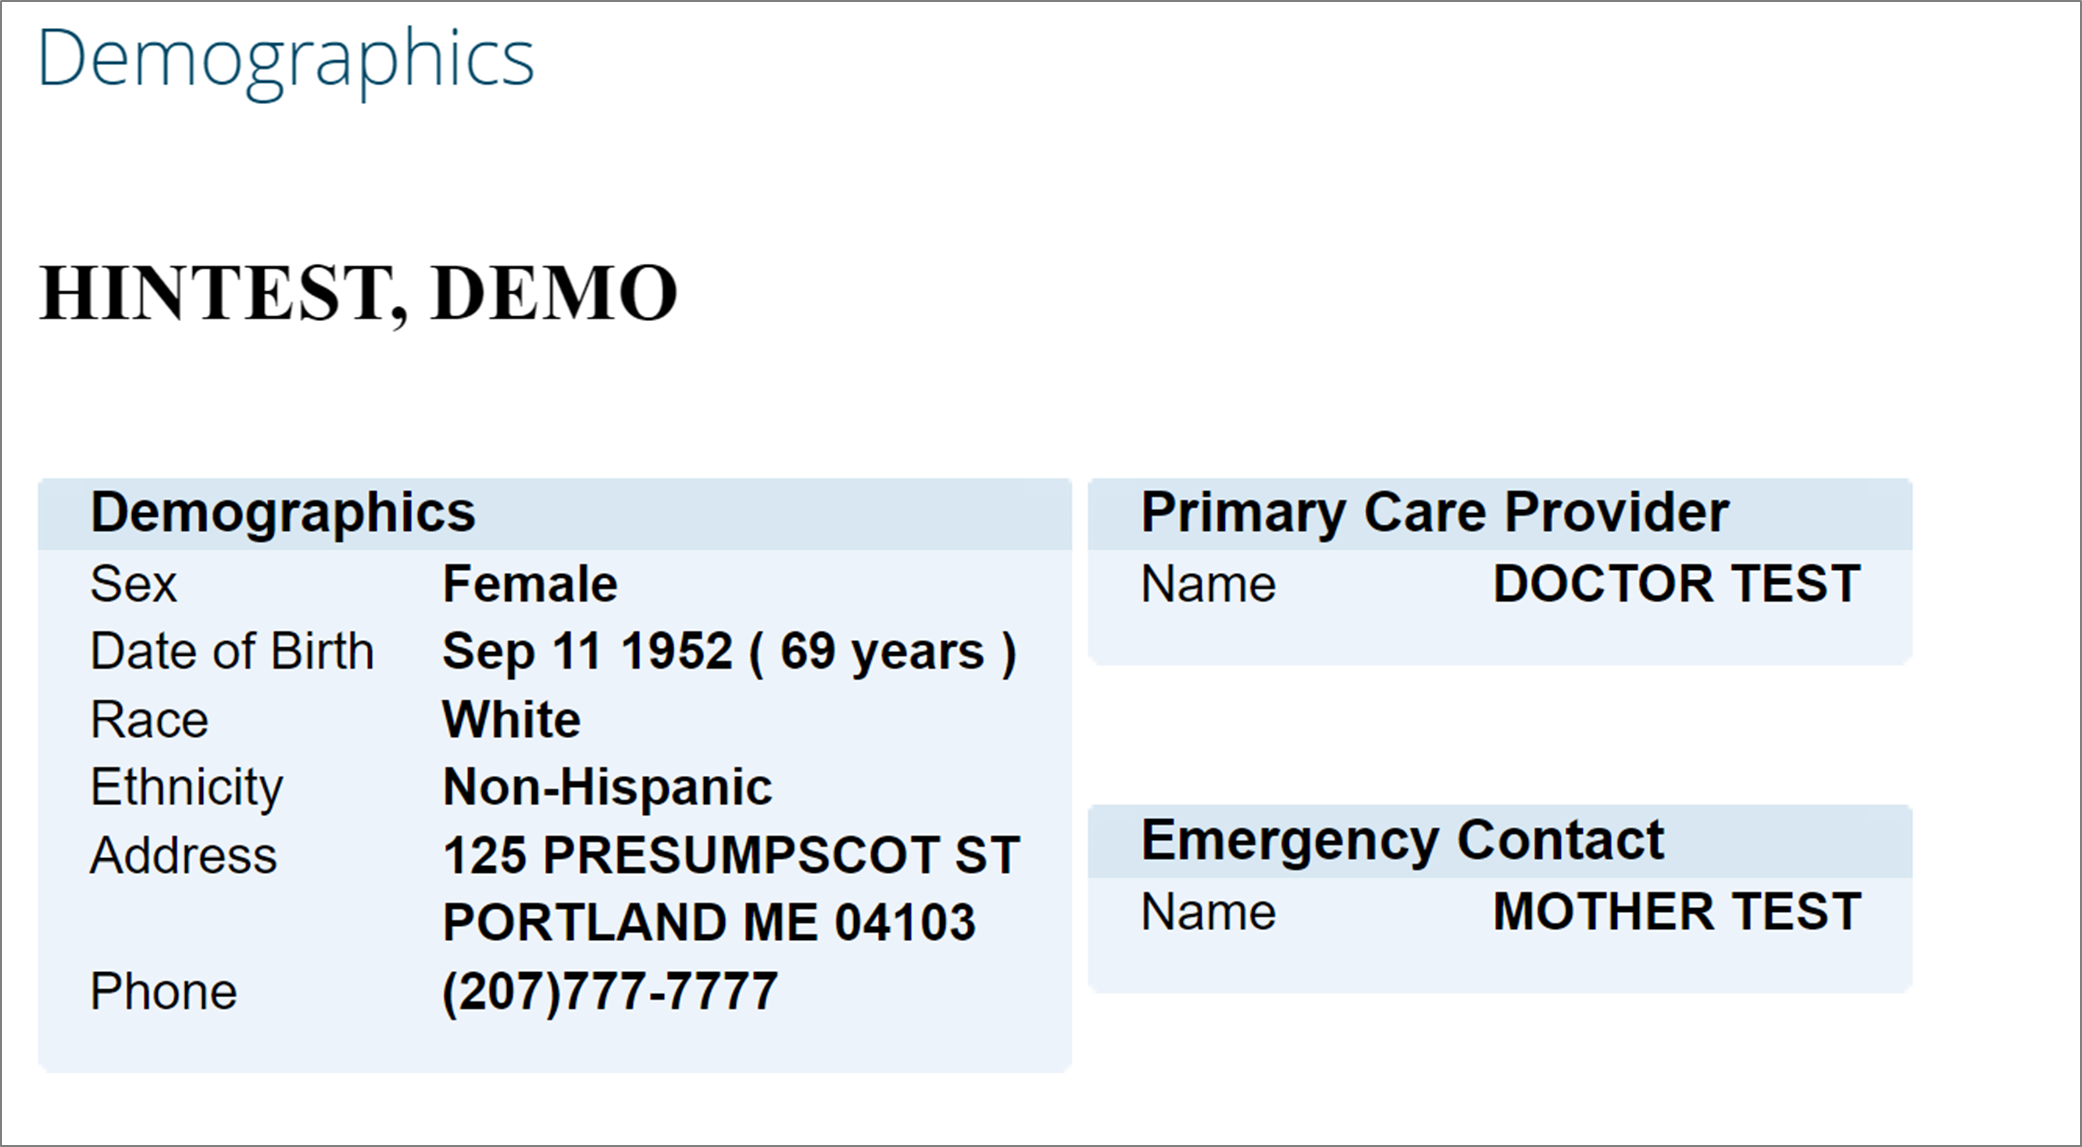
At the top of the “Patient Summary” view is the “Demographics” component, where users can identify their patient’s most updated demographic information. This information is updated each time the patient visits an HIE-participating healthcare location and can be used to inform timely and sensitive clinical decision-making and discussions.
In addition to the patient’s First and Last Names, Physical Address, Phone Number, Primary Care Provider, and Emergency Contact, the following information may also be available:
Sex - Reported values may include ‘Male,’ ‘Female,’ or ‘Non-Binary,' with an additional ‘Unknown’ grouping for sex values that do not map to the latter groupings.
Race - Reported values may be categorized into ‘AIAN’ (American Indian or Alaska Native), ‘Asian,’ ‘Black’ (Black or African American), ‘Multi’ (two or more races), ‘NHPI’ (Native Hawaiian or Pacific Islander) or ‘White’ groupings, with an additional ‘Unknown’ grouping for race values that do not map to the latter groupings.
Ethnicity - Reported values may be categorized into ‘Hispanic’ or ‘Non-Hispanic’ groupings, with an additional ‘Unknown’ grouping for ethnicity values that do not map to the latter groupings.
How to Quickly Evaluate Encounter Information
Contents contained in the “Encounter/Visit History” component are by default ordered by most recent Admission Date. But by selecting the title of a particular column, users can sort the column’s contents by grouping like-information together. That way, users can e.g., easily identify all of the same Visit Types in order to evaluate Emergency Department utilization or frequency of EMS calls had by their patients.

How to Learn More About Key Information
Wherever you find an asterisk (*) in the Clinical Portal, it signifies that additional information may be hidden behind the displayed text. By hovering over the text associated with the asterisk, a pop-up text window will appear providing additional information.
For example, within the “Encounter/Visit History” component, there is an asterisk in the “Dx Category” column. By hovering over a specific ICD-10 diagnosis code in the column (e.g., “R00-R99”), users will be presented with the plain text description of the code (e.g., “Symptoms, Signs, and Abnormal Clinical and Lab Findings, Not Elsewhere Classified”).

How to Access More Information
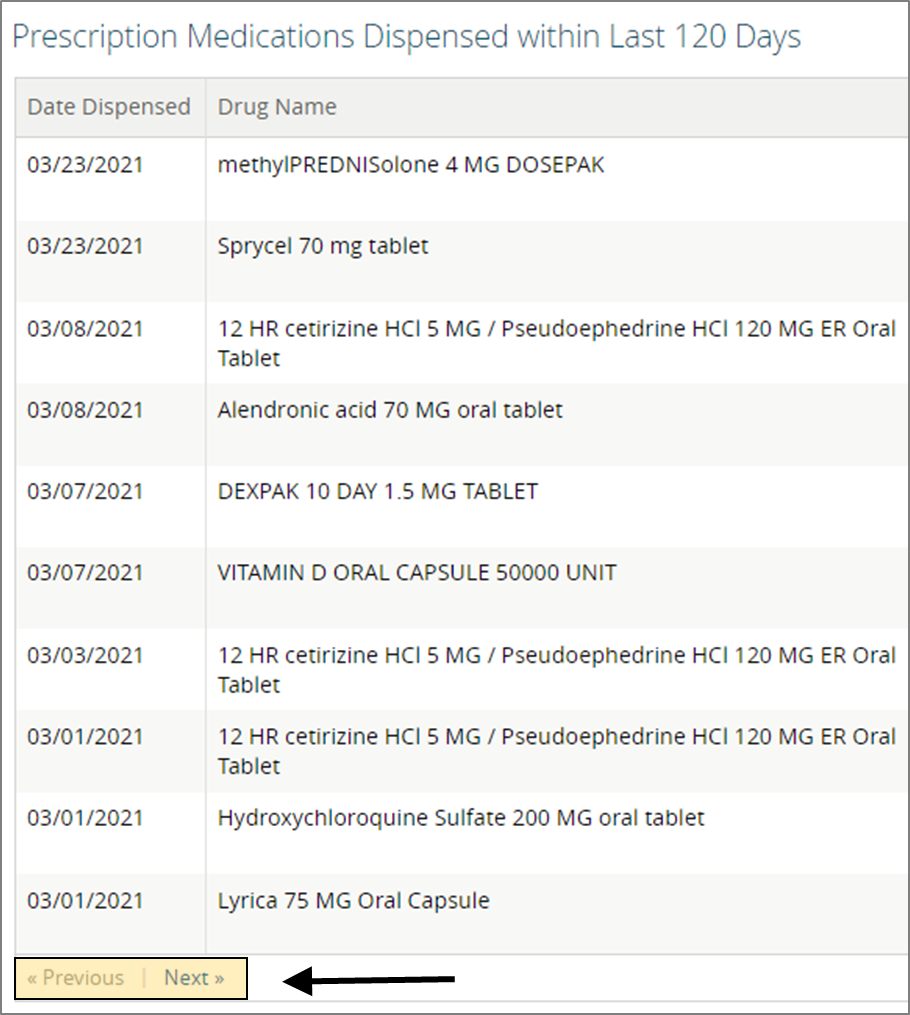
When viewing a patient’s health record information in their “Patient Summary” view, be sure to check whether any of the components on the screen have “Previous” or “Next” buttons at the bottom of their tables, indicating that additional information is available for the patient. Although the Clinical Portal is designed to show the most recent information descending in the tables in an effort to make the most relevant information readily accessible to users, there may not be enough room in the initial view of the table to store of all of the patient’s information.
For example, if a user is reviewing their patient’s “Medication Management” component and cannot seem to find what they are looking for, the component may have a “Next” button at the bottom of its table that, once selected, will display additional dispensed medications for review.
How to Easily Find Documents
Contents contained in the "Document View" will vary by patient based on their specific encounters and/or data received from participating providers.
By selecting the eye icon users can configure the display of contents in the "Document View" according to their personal preferences:
Show – Options to show all documents or only those received within a certain period of time
Group By – Options to group the documents by Category, Date, Service, or Provider
Sort By – Options to sort the ordering of documents by Date, Title, or Provider
Alternatively, users may also choose to select the magnifying glass icon to search the repository by keyword.

How to Trend Lab Results Over Time
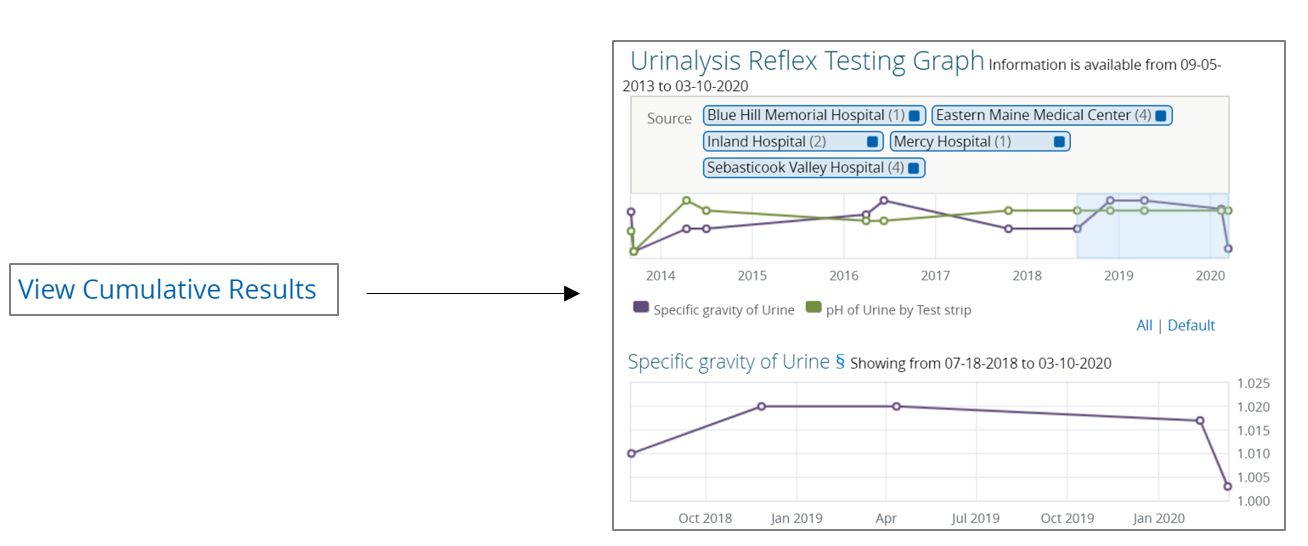
Upon selecting a particular laboratory test result from the “Document View,” users are given the option to graph the patient's results over time by selecting the "View Cumulative Results" hyperlink located to the right of the document title.
How to Interpret Available Medication Information
Within the “Patient Summary” view, the “Medication Management” component provides a list of all of a patient’s dispensed medications over the last 120 days. This history is sourced from two combined, de-duplicated data sets: (1) Surescripts Rx Hub and (2) MaineCare (Maine Medicaid). While both data sources are based on claims data, and therefore prescriptions must be reported on a claim in order to be included in the table, the Surescripts Rx Hub feed is updated on a daily basis whereas the MaineCare feed is updated on a monthly basis (and includes a 30-day dispense-date lag).

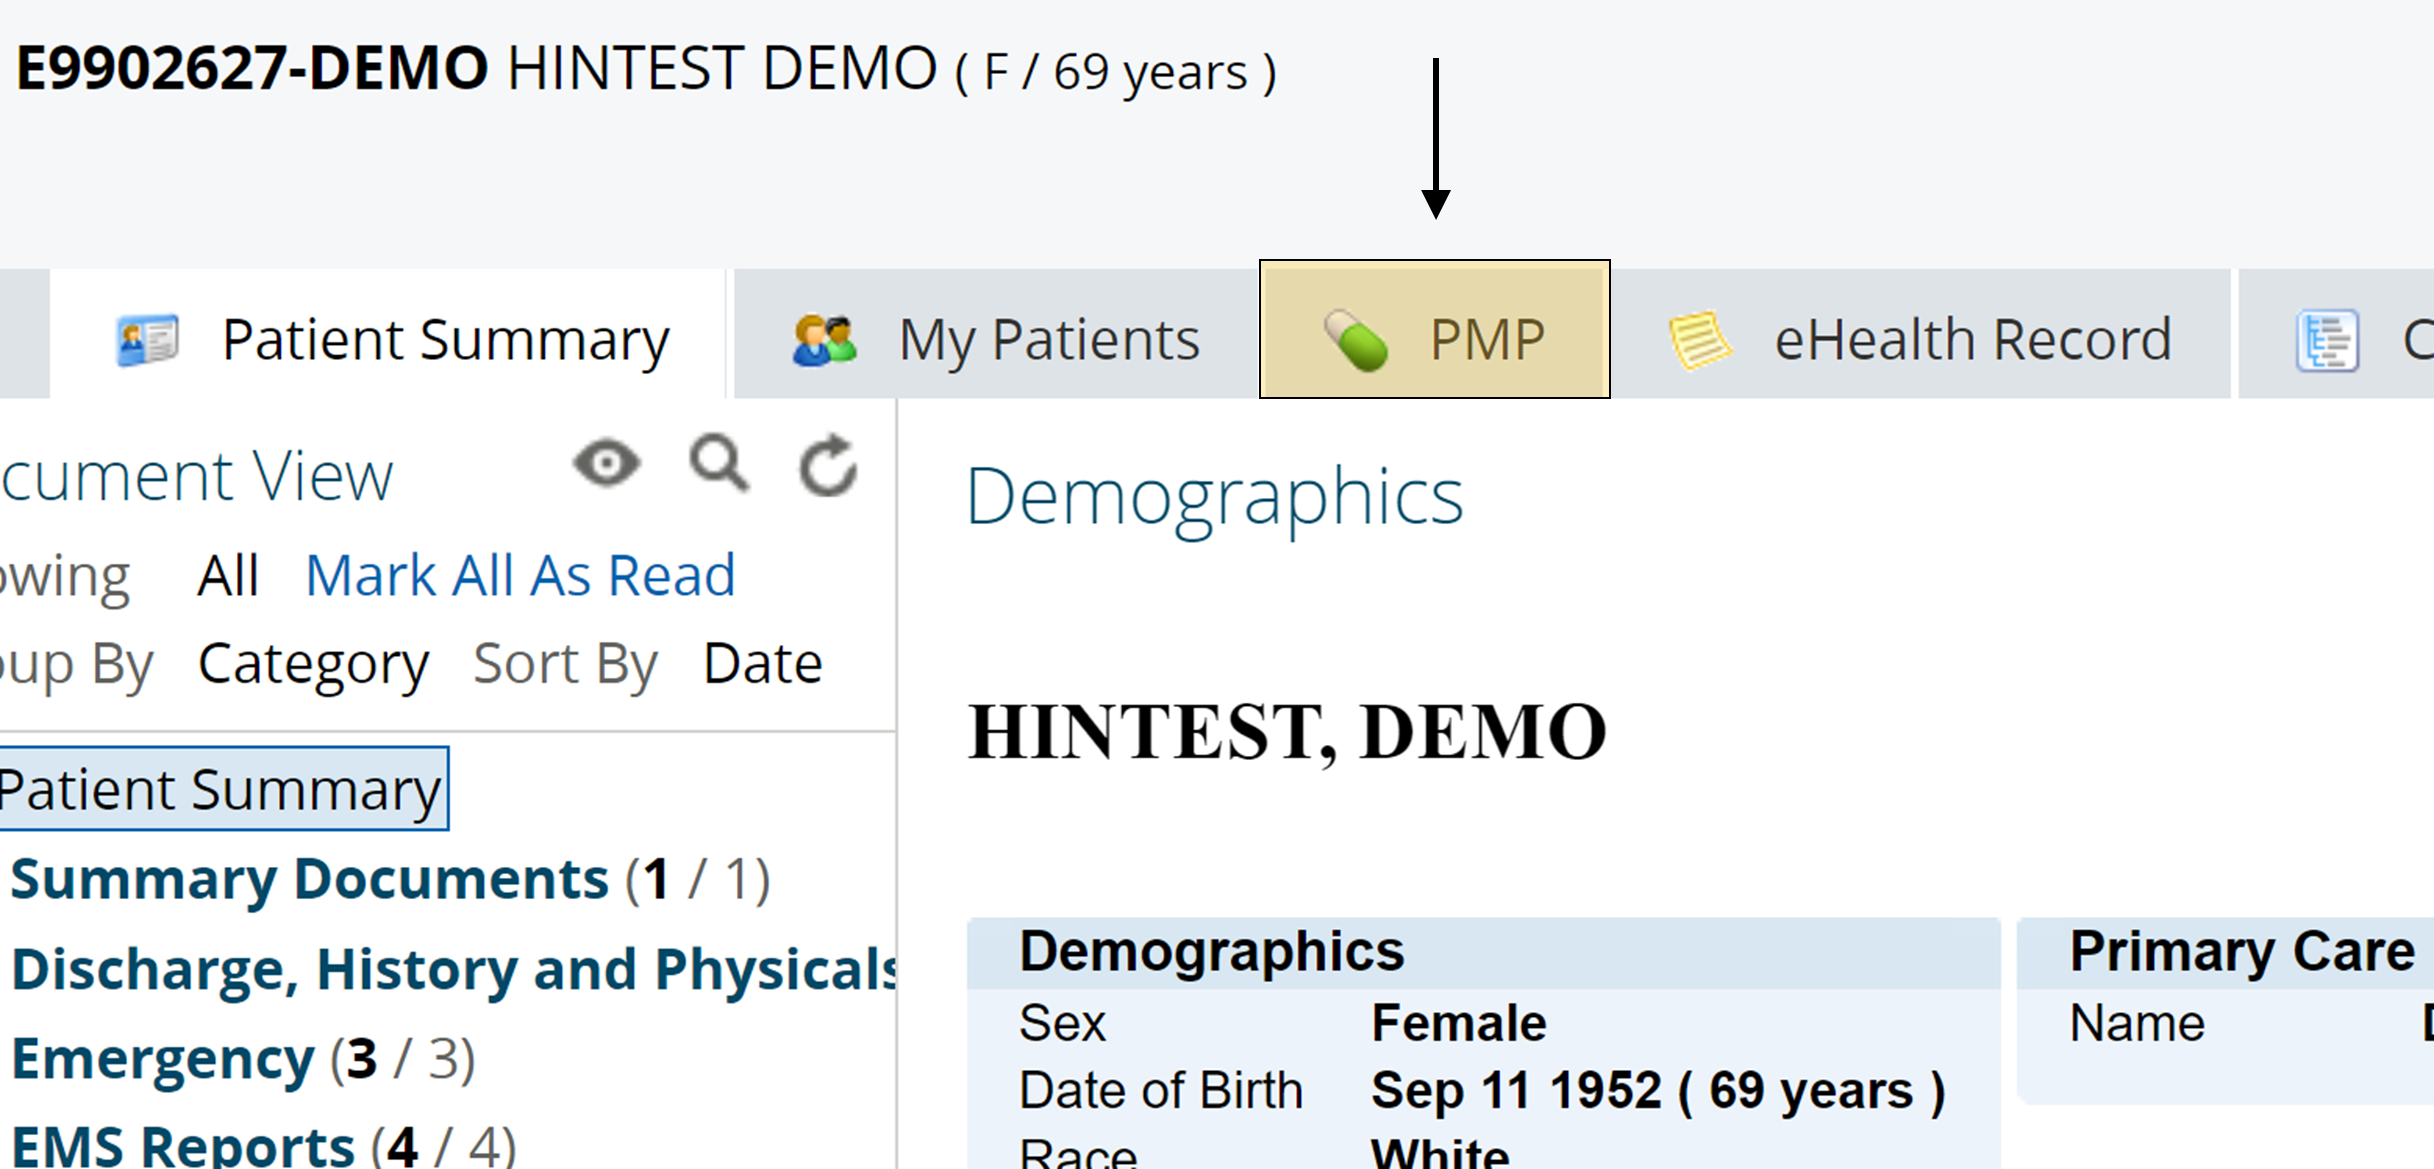
For users interested in obtaining information about their patients' controlled prescription medications through the statewide Prescription Monitoring Program (PMP), the Clinical Portal has an integration with the system that is accessible through the “PMP” tab at the top of the “Patient Summary” View.
For assistance in using these patient health record review helpful tips, please contact HealthInfoNet’s Clinical Education team.
Help Desk Features/Functionality
How to Ensure New Users Receive Their Welcome Emails
For new users that are credentialed by their organization’s Help Desk users via the New User Request Function, the system-generated welcome emails may arrive to their Spam and/or Junk email folders. Please remind new users to check such folders if credentials cannot be easily found within their primary inboxes.
Note: The system-generated welcome emails do not include new users' usernames for security purposes. This presents an opportunity for Help Desk users to send a separate email to each new user that includes both (a) their username information and (b) a reminder to check their Spam and/or Junk email folders for the remaining contents of the welcome email.
How to Maintain User Accounts With Staff Turnover
As users leave their organizations, or change roles within their organizations such that they no longer require the use of HealthInfoNet’s services, it is important for Help Desk users to disable their accounts in a timely manner.
After identifying the user of interest via the User Lookup Function, Help Desk users can select the "Configure" hyperlink in the "Account Policy" section of the "User Details" view. Within the "Account Configuration" window that appears, the "Account Disabled" option can be checked.

After selecting the “OK” button in the window to apply the changes, Help Desk users should return to the “User Details” view and provide a brief message in the “Description” field indicating the reason(s) for disabling the user’s account.

How to Request New User Accounts for VPN Versus 2FA Workflows
For new users that will be accessing HealthInfoNet’s services via a virtual private network (VPN) connection, Help Desk users should create all new user accounts via the New User Request Function.
However, for new users that will be accessing HealthInfoNet’s services via a two-factor authentication (2FA) connection, functionality does not yet allow Help Desk users to create new user accounts. For that reason, Help Desk users must continue to complete the Clinical Portal New User Request Form (VIP) for all new user requests and share the file with HealthInfoNet’s Customer Care team (customercare@hinfonet.org).
For assistance in using these Help Desk features/functionality helpful tips, please contact HealthInfoNet’s Clinical Education team.
Auditor Features/Functionality
What Can Be Audited
Auditor users are provided with the necessary self-service audit reporting functionality to view (a) their organizations’ user activity within HealthInfoNet’s Clinical Portal and (b) their patients’ record accesses among all users within the Clinical Portal.
How to Minimize the Time to Generate an Audit Report
By default, the “Privacy Log” audit option applies a 3-month lookback period to all searches. If possible based on Auditor users' report specifications, it is recommended to shorten the date range even further (i.e., to less than a 3-month lookback period) in order to minimize the total amount of time the report takes to generate.
Note: Using the User ID or the User Associated Facility search criterion alone (and not in combination with other criteria) may take several minutes to generate given the volume of data requested to be retrieved.
When to Perform Audits
The frequency of performing situational and/or routine audits of user and/or patient activity within HealthInfoNet’s services depends on each participating organization’s privacy and compliance processes and protocols. Should participating organizations need support in performing audits, they can contact HealthInfoNet’s Clinical Education team (clinicaleducation@hinfonet.org) for assistance; a service agreement and/or budget may be necessary based on the nature of the request.
For assistance in using these Auditor features/functionality helpful tips, please contact HealthInfoNet’s Clinical Education team.
Educational Resources
How to Access the “UpToDate” Medical Resource
Within the "Links" main navigation function, located on the left hand side of the screen, users may find additional applications and software, such as the "UpToDate" point of care medical resource, depending on their role, organization, and relationship with HealthInfoNet.

How to Access the HealthInfoNet Academy Resources
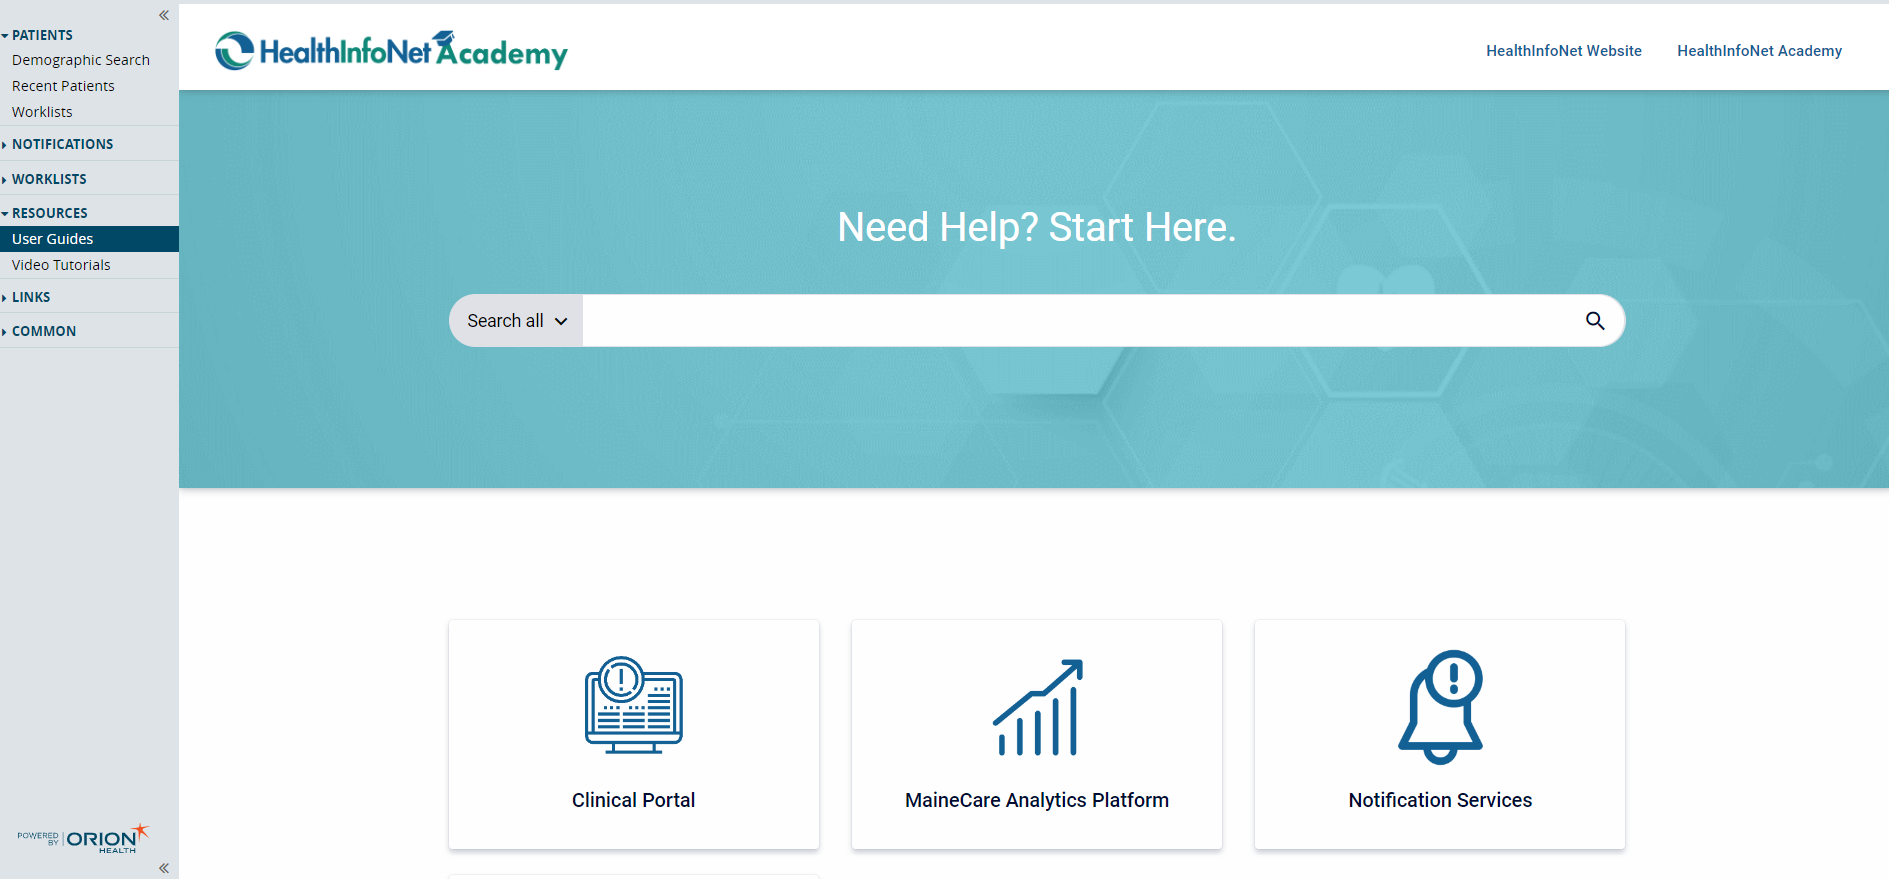
Within the "Resources" main navigation function, located on the left hand side of the screen, users may find additional educational resources developed by HealthInfoNet’s Clinical Education team. These resources are made available through HealthInfoNet Academy, HealthInfoNet’s online learning platform, and include both written user guides (like the one you are reading now!) as well as video tutorials.

For assistance in using these educational resources helpful tips, please contact HealthInfoNet’s Clinical Education team.
Technical Troubleshooting
Why Can’t I Log In?
If a user is unable to log in to the Clinical Portal, but knows that they have credentials to access the system, it may be because their account is either set as Inactive or as Disabled.
Inactive Accounts - Accounts that have been automatically flagged by the Clinical Portal after 180 consecutive days of no use by the selected user.
Disabled Accounts - Accounts that have been flagged by either a Help Desk user or HealthInfoNet's Customer Support team to indicate that the selected user should never regain access to the Clinical Portal, unless with documented exceptions.
To check whether their account is either Inactive or Disabled, users should contact their internal Help Desk. If further assistance is needed, users can contact HealthInfoNet’s Customer Support team.
Why Can’t I Reset My Password?
In order for users to be able to reset their passwords, they must proactively set a Security Question for their account. To do so, users can visit the "My Details" option within the "Common" main navigation function and select the "Set My Security Question" link.

As long as they have a Security Question set, users will be able to use the "Forgot your password" link located on the portal's login screen to receive instructions to their email on how to reset their password.

If users are not able to reset their own password, they can contact their organization's Help Desk user or HealthInfoNet's Customer Support team for assistance.
Note: Users will be required to reset their passwords for security purposes upon their first login and every 90 days thereafter.
For technical troubleshooting assistance, please contact HealthInfoNet’s Customer Support team.
